Persian Naw Ruz (Now Ruz) Explained in a Great Cookbook, New Food of Life

Persian Naw Ruz (Now Ruz) Explained in a Great Cookbook, New Food of Life

If you read my previous post on Sabzeh, you might be interested in the history behind this celebration. A very detailed explanation of the celebration as experienced in Persia (Iran) is found in a great cookbook, entitled New Food Of Life: Ancient Persian and Modern Iranian Cooking and Ceremonies, by Najmieh Batmanglij. You can find this on pages 403-408 in the 2008 edition. This is a beautiful book with enticing photos of the prepared food AND ancient Persian art. The book jacket describes the book as “a treasure of 250 classical and regional Iranian recipes. 120 color photographs of food intertwined with Persian miniatures and illustrations together with descriptions of ancient and modern ceremonies make New Food of Life not just a collection of excellent recipes but also an introduction to Persian art and culture.”

The book is lovely and interesting enough to be a coffee table book, especially for foodies, travelers and art historians.

I didn’t buy the book for any of those reasons though. I bought it to explore a cuisine I could cook for my husband who is allergic to wheat. Very few of the recipes use wheat; there is much more use of rice. So if you or a family member have issues with wheat, you might explore Persian cuisine. I’m sure there are other good cookbooks out there. I’m just familiar with this one and it is available in Barnes and Noble  stores. The author does a good job of addressing the issue of specialty ingredients. Compared to Indian cuisine, I think the Persian recipes call for fewer exotic ingredients. Still, you will need access to a middle Eastern grocery store for some of the ingredients. Helpfully, the author includes a list of specialty stores by state and city in the back of the book. The one I explored in Houston, Phoenicia Supermarket on Westheimer, was a true delight to visit. They supply ingredients for many middle eastern cuisines as well as cooking supplies, books, carryout, and a dining area.  It’s a great place to explore.

Naw Ruz being March 21, I wish you Happy Naw Ruz!

Olive oil and fish tips from the cruise

Olive oil and fish tips from the cruise

Here are more food preparation and ingredients tips I learned on Holland American’s Westerdam on our August cruise to Alaska. It was so much fun learning about cooking from some great chefs, while experiencing all the wonders of Alaska and cruising.

Here’s a way to analyze the quality of  honey, olive oil, and maple syrup. Take a flat plate, pour a couple of tablespoons onto the plate. Take your index finger and make a channel through the middle of the liquid. Watch how quickly the liquid flows back together. The more quickly, the lesser the quality of the liquid, whether honey, olive oil or maple syrup. This tip from Chef Phillip from the Westerdam, Holland America cruise line.

Here are some money saving tips regarding olive oil. In cooking with olive oil,  it is not necessary to use your precious, expensive Extra Virgin Olive Oil for sautéing or frying. A lesser oil will do just fine. Save your EVOO for pesto and salads. To further economize when cooking with olive oil, use a mixture of olive oil and canola oil for your frying and sautéing.  The proportions should be 1 part olive oil to 4 parts canola. The reasons behind this are that the olive oil can be too strong a taste in some cases, and also you can heat the oil mixture to a higher heat without smoking than what would be possible with olive oil alone. A final olive oil tip: buy it in a can, not a glass or plastic bottle for extended shelf life.

Now for a couple of tips concerning preparation of fish: one, don’t pepper salmon before frying or sautéing. Use only a little salt. The same advice holds for halibut. Put pepper on after cooking. The surprising reason is that pepper burns easily.

Second, when cooking fish, dry it first so you don’t wind up “poaching” the fish.

Third, you don’t have to marinate fish overnight because there is no connective tissue that has to be broken down by the marinade.

The final ingredients tip I got was that in making a recipe that calls for bread crumbs, consider whether it would be advantageous for the bread crumbs to absorb a maximum amount of liquid. If so, choose Panko bread crumbs: They are dried so that they soak up more of the liquid.

It was fun learning these tidbits. It made me realize that although I used to consider myself a good cook, my cooking is really pedestrian. That being said, I still love to cook for my family and they still appreciate my efforts. That’s what really counts.

Chocolate Martinis or Why You Should Cruise With Holland America!

Chocolate Martinis or Why You Should Cruise With Holland America!

On our recent cruise to Alaska on Holland America’s Westerdam, I was able to gather many good entertaining, floral design, and food preparation tips. We got to experience a tour of the galley, a demo on making chocolate martinis, a talk on chocolate, a talk on flower arranging, and a cooking class with one of the head chef’s on board.

I’m pondering if there would be a way to deduct some of the cost of the cruise as a business expense since I learned so much that will be useful, either in things I can share with my guests at my Entertaining At Home parties, or in blog posts!  Probably not!

First of all, let me highly recommend Holland America as a cruise line choice if you do enjoy cooking or entertaining. They have a whole stage dedicated to their Culinary Arts Center. Recipes we got to observe being prepared were provided to us on nice recipe cards. When we did the cooking class, we each got an apron bearing the ship’s logo and name of the Culinary Arts Center. And to top it all off, anything we got to see demonstrated, we got to eat! The highlight of that was from the cooking class, where we were served Grilled Prawn Bruschetta with Primavera Salsa, Salmon with Lemon Glaze and Rosemary Crumbs, and Grand Marnier Chocolate Volcano Cake!

So to begin, I’ll share with you the easiest tip of all: making a chocolate martini. The trick to this is taking chocolate syrup, pouring a tablespoon or so into the bottom of a martini glass, and then taking a wooden stick and dragging some of the syrup up the side of the glass in a spoke-like fashion. To make it more decorative, take the stick and make circles around the glass, dragging the stick through the spokes of the chocolate that have been pulled up the sides of the glass. This will make a spider-web design.

That’s all there is to it. Mix your favorite martini drink and strain it into the chocolate decorated glass. Here are a couple of the martini recipes they gave us. Thanks to Holland America for sharing these recipes.

Lightning Fast Chocolate Martini

3 oz Premium Vodka

1.5 oz. Chocolate Liqueur or Crème de Cacao

Double Chocolate Chocolate Martini

3 oz. Premium Vodka

1.5 oz. Chocolate Liqueur or Crème de Cacao

2 tsp. Chocolate Syrup

Chocolate Orange Martini

3 oz. Premium Vodka

2.5 oz. Chocolate Liqueur or Crème de Cacao

1 oz. Grand Marnier

Chocolate Hazelnut Martini

3 oz. Premium Vodka

2.5 oz. Chocolate Liqueur or Crème de  Cacao

1 oz. Frangelico Hazelnut Liqueur

Chocolate Espresso Martini

0.5 oz. Cold Espresso

2.5 oz. Premium Vodka

1.5 oz. Kahlua or Sabrosa coffee liqueur

1.5 oz. chocolate liqueur or Crème de Cacao.

For all of these recipes, pour all listed ingredients into a cocktail shaker packed with ice. Shake vigorously for 8-10 seconds. Strain into an ice chilled martini glass and enjoy.

Since I’m a tea-totaller, I’m looking for suggestions as to how to use this  presentation idea with a non-alcoholic drink. Any ideas? Let me know in a comment below. Thanks!

Gorgonzola cheese, honey, and ciabatta bread: Is it a Polish recipe?

Gorgonzola cheese, honey, and ciabatta bread: Is it a Polish recipe?

I do home parties for my company, Entertaining At Home. Some parties are better than others. Some can be less than desirable from a financial standpoint. The party where I experienced this recipe was one of the latter but I swear the recipe I took away from that party made up for the low sales.

My hostess was from Poland. I tried a  minute ago to Google Polish gorgonzola bread to see if this recipe is unique to Poland. It doesn’t seem to be.

It is however, a very unique and unexpected combination of flavors, which if I hadn’t tried myself, I’m not sure I would believe how good it is.

Gorgonzola-cheese

Here is the ingredient list:

Ciabatta bread

Whole garlic cloves

Gorgonzola cheese

Honey

Olive oil

Technique:

1) Slice the ciabatta bread in half, lay the two halves on a baking sheet and brush them with olive oil lightly.

2) Toast the bread lightly in a 450 degree oven.

3) While the bread is warm, rub a peeled garlic clove or two all over the hot bread. This imparts the lightest touch of garlic flavor to the bread.

4) Crumble the gorgonzola cheese over the bread. I had never had gorgonzola cheese before (and I don’t like bleu cheese). I was pleased to find that gorgonzola is much milder than bleu cheese.

5) Put the bread back into the oven to melt the cheese into the bread.

6) When melted, remove the bread from the oven and slice it into small pieces, a little larger than bite-size.

7) Here’s the magic to the recipe and the stunning finale to the recipe: drizzle honey over the bread. Who would have expected that!

The combination of the pungent cheese, the subtle garlic flavor, and the sweet honey is a taste that must be experienced.

So please try this recipe sometime.  And if you happen to know whether or not this is a Polish recipe, I would love to know. Thanks.

Home-made Playdough Party For the Kids

Home-made Playdough Party For the Kids

Authors’s note: This blog is being reissued to include a tip submitted by my neice, a tip that is just too good to not share with you. Read on for an alternative way to color the playdough. Thanks Megan for your wonderful comment.

It’s hot, summer is dragging on,  the younger children are so bored.  Invite a few of your children’s friends over for a playdough party. Their moms will be grateful and your kids will enjoy an afternoon making their very own playdouh, as well as the fun associated with playing with playdough after it’s made.

Homemade playdough has several different recipe variations. Some not cooked, and others like this one that are cooked. The cooked variety has more of the feel of the commercial playdough, but not the chemicals. There is nothing in the ingredients that would harm your child if ingested. To top it off, the ingredients are very inexpensive.

The recipe itself is very simple and requires no ingredients not commonly stocked in most kitchens. The most exotic ingredient is cream of tartar. Here is the ingredient list:

Ingredients:

1 cup flour

1/2 cup salt

2 teaspoons cream of tartar  (if you’ve never heard of it, you’ll find it in the spice section of the grocery store. It is a white powder. Another use for it is in home-made meringue for pies.)

1 tablespoon salad oil (like Crisco, not canola)

1 cup water

Food color or koolaid package

Procedure:

This playdough is cooked, so depending on the age of the children, you will probably be doing the cooking yourself, but consider which parts of the measuring and assembling of the ingredients that you can engage the children in. When my boys were young, we had a children’s cooking set that included color coded measuring spoons as well as a cookbook that used pictures of the color coded measuring spoons as well as the words. Consequently, they could cook before they could read well.  My sons have turned out to be awesome cooks. Mentioning meringue, my oldest son can make a mean lemon meringue pie, completely from scratch, including the crust. So don’t shortchange your boys in the kitchen. Encourage them to learn to cook too.

Combine all the ingredients in a saucepan. A single batch would probably be best cooked in a 2 quart pan, not much bigger or smaller. Mix the ingredients and then cook over medium high heat for about 10 minutes. Stir constantly. You will be amazed at how easy it is to cook this playdough, and I warn you: it will be done instantaneously. As soon as it is the consistency we know so well for playdough, take the pan off the heat and turn the cooked mixture out onto some waxed paper. Temporarily it’s going to be pretty hot, so keep the children back from it for a bit.

Divide it into equal portions according to how many colors of playdough you want to create.

Now we are going to color the playdough. Of course, you could let the children do the next step with bare hands. There might be some staining from the food color you’ll be using to color the playdough. If you are concerned about this, put each portion of playdough into a ZipLoc  bag. Ask each child to pick his favorite color of food coloring and let him or her squeeze a few drops onto the playdough in the ZipLoc bag. Close up the bag, squeezing out most of the air right before you complete the seal. Hand each child the bag with their color and show them how to knead the dough inside the bag.

If you are not concerned about them coming into contact with the food coloring, give each child a square of wax paper, help him or her squeeze the food coloring onto the playdough and let him knead the dough on the wax paper. This can be a lesson in kneading bread dough. The technique is the same.

An alternate way to color to playdough is to mix in a package of koolaid, the dry mix, of course. We’re talking about the inexpensive $.10 packages that you have to add sugar to when making the koolaid. Not only will the powder color the playdough, it will also give it a nice fragrance.

When the dough is ready, continue the cooking lesson by teaching the children how to use a rolling pin to roll out the dough and to use cookie cutters to cut out shapes. When the kids have exhausted their imagination as to ways to play with the playdough, collect up each color, put it in the ZipLoc bag and send it home with the child who mixed that color.

Panini Parties

Panini Parties

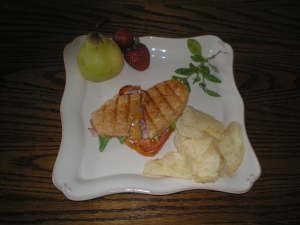
panini party 003When you have people over for dinner, don’t they always congregate in the kitchen? Why not make the entertainment for your party be the food preparation itself? A panini party is an easy way to get the guests involved in making their own food.
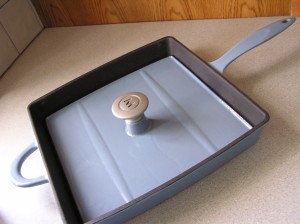
Panini is the plural of “panino”,which means “small bread roll”  in Italian. Panini has come to refer to the sandwich made from the small roll. It is a hot sandwich prepared with a panini pan. The typical panini pan is cast iron, has parallel ridges in both the the pan and the press. The idea is to preheat both the pan and the press. That way, when you place the sandwich in the pan and put the press on top of the sandwich, you cleverly cook the sandwich  twice as fast and produce enticing grill marks on both sides of the sandwich at once.

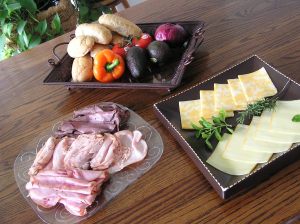
panini party 004A panini sandwich’s ingredients can really be anything that sounds appetizing to you. There would probably be cheeses, sliced meats, vegetables, maybe even some fruit. For the party, set out a nice assortment of meats, cheeses, greens, vegetables, along with a couple of choices of breads. You could have thickly sliced Italian or French bread, ciabatta bread,  or rolls.  Normally, there are no condiments on a panini sandwich. Rather, you take a pastry brush and brush the bread with a good quality olive oil. Allow your guests to assemble their sandwiches to their own tastes.
While your guests have been putting together their sandwiches, preheat the panini pan with the press inserted into the bottom of the pan. Using a silicone basting brush, coat the press with olive oil and spread olive oil over the bottom of the pan. You don’t want it too oily, nor do you want it too light on the oil.

Once the pan is preheated, invite the guests to place their sandwiches in the bottom of the pan and place the press on top of the sandwiches. Depending on the size of the bread or rolls, you will probably be able to do 2-4 sandwiches at a time.

panini servedFor this party, the fun is in the preparation and the eating. Don’t worry about everyone sitting down to eat at the same time. Serve your beverages at the stove top and let everyone eat their sandwiches as they are prepared. Trust me, they’ll be back to make a second sandwich after everyone has made their first.

If you want some recipe inspiration, check out the blog http://paninihappy.com. I predict you’ll be very hungry after you look at those pictures of great panini sandwiches. There are even dessert panini sandwiches. Got to love that! It will no doubt have you planning a panini party for your friends soon.

And lest you think a panini pan too limited in use to warrant purchase of one, did you realize it makes a great way to cook bacon? Cook the bacon with the press on top; it cooks quickly and can’t curl up.  A panini pan is also good for indoor “grilling” of hamburgers and steaks.

So next time you want to have some folks over for dinner, put them to work making their own  sandwiches. I think you will find they have a great time.

Movie Night Surprise: Nutritional Yeast on Popcorn

Movie Night Surprise: Nutritional Yeast on Popcorn

Let’s start with a poll.

1) Have you ever had popcorn with nutritional yeast on it? Yes or no.

2) Have you ever HEARD of having popcorn with nutritional yeast on it? Yes or no.

3) If you are familiar with this treat, where did you live when you had it. I’m suspecting this is a regional taste. I did some research on Google and it appears to be known in Wisconsin and California. Register your answers at the end of the post in a comment.  And if you would, ask your friends to also give their answers to this poll. Thanks.

When I was a poor law school student and a member of the Baha’i community in Fayetteville, Arkansas, I was introduced to popcorn with butter and nutritional yeast. It was a very inexpensive yet yummy treat and we were pretty much all poor students,  so that we frequently had popcorn with nutritional yeast as our refreshments for any sort of meeting. It got to be so common, that one guest questioned whether this was a ritual in the Baha’i Faith! Not so, but this has remained one of my favorite treats. Next time you are having a movie night with family or friends, give this a try. I think you will be surprised at how much they enjoy it.

Here’s how I make this treat. I pop the popcorn in a microwave popper. This allows me to not feel so guilty about drowning the popped corn in melted butter! I generally use 1/2 stick of salted butter. Pour the popped corn into your large bowl, pour the butter over the corn, salt to taste, and as the last step sprinkle nutritional yeast all over the popcorn.

A variation I read about, but have not tried myself, is to melt the butter and stir 3 tablespoons of nutritional yeast into the melted butter, which you then pour over the popcorn.

So beyond the great, nutty taste of the yeast, are there any good reasons to use nutritional yeast on your popcorn? There actually may be.  It is low in fat and sodium. It has supposed health benefits of being a sleep aid, and has been touted as an aid with diabetes, hypoglycemia, high cholesterol, eczema, and other conditions. I’m not sure I buy into any of those. I just know it is a delicious treat.

So where do you get nutritional yeast? I find it in larger grocery stores that have bulk food aisles. It looks like a yellow flake. You can also buy it online, I’m sure. However, be cautious and know the difference between “brewer’s yeast” and “nutritional yeast.” These labels are sometimes used interchangeably, but the products are slightly different. Nutritional yeast has the better taste; brewer’s yeast has a slightly bitter taste.

If you try this treat, I’d love to hear how you liked it. I’ll be watching for your poll answers too. Enjoy!

Grill Corn On the Cob the Easy Way This July 4th

Grill Corn On the Cob the Easy Way This July 4th

corn_on_the_cobWhile you are grilling those hot dogs and hamburgers this 4th of July,  why not throw the corn on the cob on the grill too?
This method of cooking the corn has to be the easiest of all options. No removing the husks and silks, no wrapping in foil, no boiling water. Preparation is very simple.

PREPARATION:

First pull back the husks a little bit from the top, just to look for any buggies.

Seeing none, immerse the corn (still in the husks) in a large bowl or pan of slightly salted water.  Let them sit there for a few minutes. This is going to accomplish two things. One, if there are any buggies lurking, this is going to flush them out. Second, it is going to saturate the corn husks, allowing them to be on the grill longer before they totally char.

Do not remove the husks and silks. You are going to grill the corn as is.

PROCEDURE:

Over a well lit charcoal fire, place the corn around the outside edge of your grill. If you put it directly over the coals, you are more likely to burn the corn kernels.  The corn will cook while you grill your meats on the central portion of the grill.

Turn the corn a couple of times. The husks are going to start to turn brown.  This is not a problem. Evenly browning the husks lets you know you’ve rotated the corn sufficiently.

As with all grilling, timing is not exact. To estimate when the corn is done, I look for well browned husks. If my meat is not done but I think the corn is, I just push the corn further away from the hot coals. If the meat is close to done and the corn is not, I’ll move the meat away from the hot coals and put the corn directly over the hot coals for a few minutes.

SERVING:

Removed the grilled corn to a large platter. To serve, using a hot pad hold the corn and carefully pull back the husks. You will be amazed at how easy this is and how the silks pull away with the husks.  Break off the husks and serve.

Should the corn be slightly undercooked, you can pop it in the microwave for a small amount of time to finish the cooking.

What vegetables do you grill and how? I’d love to hear.  Happy Fourth of July!

Ice Cream Sandwich Party

Ice Cream Sandwich Party

Ice cream sandwich 008Ice cream sandwich 003ice cream sandwich

Wouldn’t the kids love a party where they could make their own ice cream sandwiches. (Adults might like such a party too!) It’s very easy and doesn’t even require any special equipment. Ice cream sandwich makers exist, but as you’ll see– they are not at all required. In fact, they limit your creativity because you can only use a cookie of a certain diameter.

First, invite the guests to bring their favorite cookies. Sugar cookies and chocolate chip cookies are delicious, but others would be just as good. Do have your own cookie supply on hand for those guests who forget or don’t bring their own. I’d recommend that you provide the ice cream (and of course, in Texas, we love our Blue Bell ice cream–my personal favorite Natural Vanilla Bean).  You will also need sprinkles or nonpareils for the finishing touch. So buy sprinkles that fit the theme or the holiday: Fourth of July– red, white, and blue, Halloween–orange and black, and so on.

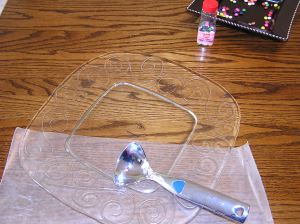
Equipment: ice cream scoop, clear glass plate, wax paper, bowl big enough to hold the sprinkles and to roll the ice cream sandwich around in.

Ingredients: ice cream, cookies, sprinkles.

Procedure: soften the ice cream slightly. You want to be able to scoop out a generous scoop of ice cream and it has to be soft enough to be flattened between two cookies.  Place a piece of wax paper down on the table. Pour some sprinkles in the bowl. Set out two cookies.

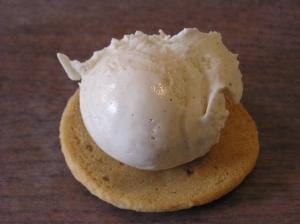
Put one cookie top side down. Put one generous scoop of softened ice cream in the center of the cookie. Top with the other cookie, top side up.

Take the clear glass plate and put it on top of the ice cream sandwich and press down. The reason you want clear glass is you want to be able to see how much ice cream is extending beyond the sides of the cookies. You want the ice cream to bulge outside the cookies. Once it does, take a knife and trim off the excess.

Pick up the ice cream sandwich and roll it around in the sprinkles, ice cream edge next to the sprinkles, picking up some of the sprinkles in the ice cream for an even more playful touch.

Quickly wrap the ice cream sandwich in plastic wrap and pop it into the freezer to harden the ice cream. This will be the hardest part: getting the kids to agree to wait. Maybe you’ll let them eat it immediately!  Enjoy!